I just keep a record for myself because there are a lot of documents teaching how to train your haar classifier and almost of them seem to don't work well. The following 2 items are clear and easy to understand.
The Data Image Source (cars) I use.
http://cogcomp.cs.illinois.edu/Data/Car/
1. Train your own OpenCV Haar classifier
https://github.com/mrnugget/opencv-haar-classifier-training
find ./positive_images -iname "*.pgm" > positives.txt
find ./negative_images -iname "*.pgm" > negatives.txt
perl bin/createsamples.pl positives.txt negatives.txt samples 550\
"opencv_createsamples -bgcolor 0 -bgthresh 0 -maxxangle 1.1\
-maxyangle 1.1 maxzangle 0.5 -maxidev 40 -w 48 -h 24"
python ./tools/mergevec.py -v samples/ -o samples.vec
opencv_traincascade -data classifier -vec samples.vec -bg negatives.txt\
-numStages 10 -minHitRate 0.999 -maxFalseAlarmRate 0.5 -numPos 1000\
-numNeg 600 -w 48 -h 24 -mode ALL -precalcValBufSize 1024\
-precalcIdxBufSize 1024
2. OpenCV Tutorial: Training your own detector | packtpub.com
https://www.youtube.com/watch?v=WEzm7L5zoZE
find pos/ -name '*.pgm' -exec echo \{\} 1 0 0 100 40 \; > cars.info
find neg/ -name '*.pgm' > bg.txt
opencv_createsamples -info cars.info -num 550 -w 48 -h 24 -vec cars.vec
opencv_createsamples -w 48 -h 24 -vec cars.vec
opencv_traincascade -data data -vec cars.vec -bg bg.txt \
-numPos 500 -numNeg 500 -numStages 10 -w 48 -h 24 -featureType LBP
P.S: Which one is best? I don't know...
Tuesday, September 13, 2016
[Image] How to resize, convert & modify images from the Linux
Installation
$ sudo apt-get install imagemagick
Converting Between Formats
$ convert howtogeek.png howtogeek.jpg
You can also specify a compression level for JPEG images:
$ convert howtogeek.png -quality 95 howtogeek.jpg
Resizing Images
$ convert example.png -resize 200×100 example.png
- to force the image to become a specific size – even if it messes up the aspect ratio
$ convert example.png -resize 200×100! example.png
$ convert example.png -resize 200 example.png
$ convert example.png -resize x100 example.png
Rotating an Image
convert howtogeek.jpg -rotate 90 howtogeek-rotated.jpg
Applying Effects
ImageMagick can apply a variety of effects to an image.
- For example, the following command applies the “charcoal” effect to an image:
$ convert howtogeek.jpg -charcoal 2 howtogeek-charcoal.jpg
- the “Implode” effect with a strength of 1:
# convert howtogeek.jpg -implode 1 howtogeek-imploded.jpg
Batch Processing
for file in *.png; do convert $file -rotate 90 rotated-$file; done
Reference:
http://www.howtogeek.com/109369/how-to-quickly-resize-convert-modify-images-from-the-linux-terminal/
Thursday, September 8, 2016
[TensorFlow] My case to install TensorFlow with GPU enabled
My Operation System is Ubuntu 14.04 LTS 5 and GPU card is GeForce GTX 750Ti
1. Go to nvidia.com and download the driver (NVIDIA-Linux-x86_64-367.44.sh)
1. Go to nvidia.com and download the driver (NVIDIA-Linux-x86_64-367.44.sh)
2. For Nvidia to find linux header files (*):
$ sudo apt-get install build-essential linux-headers-$(uname -r)
3. To enable full screen text mode (nomodeset):
$ sudo gedit /etc/default/grub
>> Edit GRUB_CMDLINE_LINUX_DEFAULT="quiet splash nomodeset"
Save it and reboot
$ sudo update-grub
$ sudo reboot
4. Log into with Ctl +Alt + F1
5. Stop the X Server service
$ sudo service lightdm stop
6. Install nVidia driver
$ sudo ./NVIDIA-Linux-x86_64-367.44.sh
7. Install CUDA (GPUs on Linux)
Download and install Cuda Toolkit
sudo dpkg -i cuda-repo-ubuntu1404-8-0-local_8.0.44-1_amd64.deb
sudo apt-get update
sudo apt-get install cuda
8. Download and install cuDNN
tar xvzf cudnn-8.0-linux-x64-v5.1.tgz
cd cudasudo cp include/cudnn.h /usr/local/cuda-8.0/include
sudo cp lib64/* /usr/local/cuda-8.0/lib64
sudo chmod a+r /usr/local/cuda-8.0/lib64/libcudnn*
9. You also need to set the LD_LIBRARY_PATH and CUDA_HOME environment variables. Consider adding the commands below to your ~/.bash_profile. These assume your CUDA installation is in /usr/local/cuda:
$ vim ~/.bashrc
export LD_LIBRARY_PATH="$LD_LIBRARY_PATH:/usr/local/cuda-8.0/lib64"export CUDA_HOME=/usr/local/cuda-8.0
export PATH="$CUDA_HOME/bin:$PATH"
export PATH="$PATH:$HOME/bin"
10. To install TensorFlow for Ubuntu/Linux 64-bit, GPU enabled:
$ sudo pip install --upgrade https://storage.googleapis.com/tensorflow/linux/gpu/tensorflow-0.10.1-cp27-none-linux_x86_64.whl
$ sudo pip install --upgrade https://storage.googleapis.com/tensorflow/linux/gpu/tensorflow-0.10.1-cp27-none-linux_x86_64.whl
To find out which device is used, you can enable log device placement like this:
$ python
>>>> import tensorflow as tf
>>>> sess = tf.Session(config=tf.ConfigProto(log_device_placement=True))
$ python
>>>> import tensorflow as tf
>>>> sess = tf.Session(config=tf.ConfigProto(log_device_placement=True))
Tuesday, August 16, 2016
[OpenCV] To install OpenCV on Debian and create a test project using Netbeans
This document is the steps to install OpenCV on Debian and create a test project using Netbeans for my reference in case.
#Prepare the build environment GCC、Cmake、pkgconfig
#Install ImageI/O libraries
#Install Viode I/O libraries
#Install GTK+2.x and QT libraries
#Prepare the build environment GCC、Cmake、pkgconfig
$sudo apt-get -y install build-essential cmake pkg-config
#Install ImageI/O libraries
$sudo apt-get -y install libjpeg62-dev libtiff4-dev libjasper-dev
#Install Viode I/O libraries
$sudo apt-get -y install libavcodec-dev libavformat-dev libswscale-dev libv4l-dev
$sudo apt-get -y install libdc1394-22-dev libxine2-dev libgstreamer0.10-dev libgstreamer-plugins-base0.10-dev
#Install GTK+2.x and QT libraries
$sudo apt-get -y install libgtk2.0-dev libqt4-dev
Thursday, August 11, 2016
[Hadoop] Setting up a Single Node Cluster
Basically these resource links are good enough to do a single node cluster of Hadoop MapReduce. But I still want to add some comments for my reference.
http://www.thebigdata.cn/Hadoop/15184.html
http://www.powerxing.com/install-hadoop/
Login the user "hadoop"
Go to the location of Hadoop
Add the variables in ~/.bashrc
Modify $JAVA_HOME in etc/hadoop/hadoop-env.sh
Start dfs and yarn
Finally, we can try the Hadoop MapReduce example as follows:
P.S:
In order to forcefully let the namenode leave safemode, following command should be executed:
http://www.thebigdata.cn/Hadoop/15184.html
http://www.powerxing.com/install-hadoop/
Login the user "hadoop"
# sudo su - hadoop
Go to the location of Hadoop
# /usr/local/hadoop
Add the variables in ~/.bashrc
export JAVA_HOME=/usr/lib/jvm/java-7-openjdk-amd64
export HADOOP_HOME=/usr/local/hadoop
export HADOOP_CONF_DIR=$HADOOP_HOME/etc/hadoop
export HADOOP_INSTALL=/usr/local/hadoop
export PATH=$PATH:$HADOOP_INSTALL/bin
export PATH=$PATH:$HADOOP_INSTALL/sbin
export HADOOP_MAPRED_HOME=$HADOOP_INSTALL
export HADOOP_COMMON_HOME=$HADOOP_INSTALL
export HADOOP_HDFS_HOME=$HADOOP_INSTALL
export YARN_HOME=$HADOOP_INSTALL
Modify $JAVA_HOME in etc/hadoop/hadoop-env.sh
export JAVA_HOME=/usr/lib/jvm/java-7-openjdk-amd64
Start dfs and yarn
# sbin/start-dfs.sh
# sbin/start-yarn.sh
Finally, we can try the Hadoop MapReduce example as follows:
# bin/hadoop jar share/hadoop/mapreduce/hadoop-mapreduce-examples-2.7.0.jar grep input output 'dfs[a-z.]+'
P.S:
In order to forcefully let the namenode leave safemode, following command should be executed:
# hdfs dfsadmin -safemode leave
Tuesday, August 2, 2016
[Tensorflow] Fizz-Buzz example enhancement
I am just based on this Fizz-Buzz example as below to add 2nd convolution layer and guess what? The result is quicker to be learn. But, this is just the first step to learn "Deep Learning"...
There is still a lot of things and knowledge that need to learn more.
http://joelgrus.com/2016/05/23/fizz-buzz-in-tensorflow/
Before
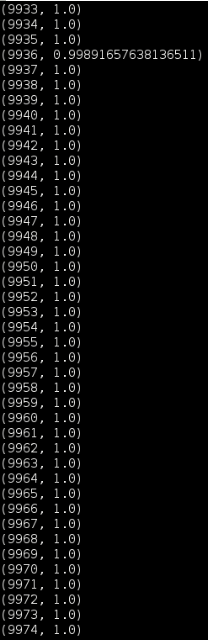
After

Reference
http://www.slideshare.net/WrangleConf/wrangle-2016-lightning-talk-fizzbuzz-in-tensorflow
There is still a lot of things and knowledge that need to learn more.
http://joelgrus.com/2016/05/23/fizz-buzz-in-tensorflow/
Before

After

Reference
http://www.slideshare.net/WrangleConf/wrangle-2016-lightning-talk-fizzbuzz-in-tensorflow
Monday, July 25, 2016
[Neutron] The first glance of L3HA mode in OpenStack Neutron ( Liberty version )
I just quickly take the first glance of L3HA mode in OpenStack Neutron ( Liberty version ) and is based on my tenant environment as follows:

# neutron net-list


Here I have 2 instances in my tenant:

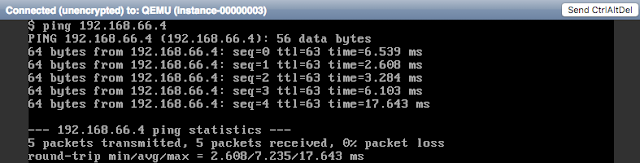
So, if I use the instance: daanny_vm1 to ping danny_vm2, due to the different subnets, this action will trigger L3 vrouter function.
# ping 192.168.66.4 ( danny_vm2 )
# ip netns exec qrouter-f1e03fef-cccf-43de-9d35-56d11d636765 tcpdump -eln -i qr-4433f31f-5d icmp

The interface qr-4433f31f-5d is my subnet 192.168.44.0/24's gateway port as follows:


My tenant environment
# neutron router-list# neutron net-list

# neutron subnet-list

The Topology view looks like this:

Here I have 2 instances in my tenant:

So, if I use the instance: daanny_vm1 to ping danny_vm2, due to the different subnets, this action will trigger L3 vrouter function.
# ping 192.168.66.4 ( danny_vm2 )

# ip netns exec qrouter-f1e03fef-cccf-43de-9d35-56d11d636765 tcpdump -eln -i qr-4433f31f-5d icmp

The interface qr-4433f31f-5d is my subnet 192.168.44.0/24's gateway port as follows:
# neutron --os-tenant-name danny port-list | grep 4433f31f-5d
| 4433f31f-5d93-4fe4-868a-04ddcc38be20 |                                                 | fa:16:3e:25:22:b3 | {"subnet_id": "d169f180-4304-42f0-b11f-e094287bcd00", "ip_address": "192.168.44.1"}  |
Keepalived related
L3HA mode is havily relied on the daemon: Keepalived and this daemon is existed in qrouter namespace.
# vi /var/lib/neutron/ha_confs/f1e03fef-cccf-43de-9d35-56d11d636765/keepalived.conf
vrrp_instance VR_1 {
    state BACKUP
    interface ha-857640ad-a6
    virtual_router_id 1
    priority 50
    garp_master_delay 60
    nopreempt
    advert_int 2
    track_interface {
        ha-857640ad-a6
    }
    virtual_ipaddress {
        169.254.0.1/24 dev ha-857640ad-a6
    }
    virtual_ipaddress_excluded {
        10.12.20.32/16 dev qg-f02984c6-dc
        10.12.20.33/32 dev qg-f02984c6-dc
        192.168.44.1/24 dev qr-4433f31f-5d
        192.168.55.1/24 dev qr-16e20a36-fc
        192.168.66.1/24 dev qr-35235c4f-64
        fe80::f816:3eff:fe0d:2702/64 dev qr-16e20a36-fc scope link
        fe80::f816:3eff:fe25:22b3/64 dev qr-4433f31f-5d scope link
        fe80::f816:3eff:fe51:30a1/64 dev qg-f02984c6-dc scope link
        fe80::f816:3eff:fe8f:a85b/64 dev qr-35235c4f-64 scope link
    }
    virtual_routes {
        0.0.0.0/0 via 10.12.0.254 dev qg-f02984c6-dc
    }
}
There are other two files under /var/lib/neutron/ha_confs/<< qrouter uuid >>/
neutron-keepalived-state-change.log ==> log file
state ==> HA status
# find -L /proc/[1-9]*/task/*/ns/net -samefile /run/netns/qrouter-f1e03fef-cccf-43de-9d35-56d11d636765 | cut -d/ -f5
2276895
2276896
2277216
2277217
3284547
# ps aux | grep -e "2276895|2276896|2277216|2277217|3284547"
neutron 2276895 0.0 0.0 126160 41364 ? S Jul22 0:00 /usr/bin/python2.7 /usr/bin/neutron-keepalived-state-change --router_id=f1e03fef-cccf-43de-9d35-56d11d636765 --namespace=qrouter-f1e03fef-cccf-43de-9d35-56d11d636765 --conf_dir=/var/lib/neutron/ha_confs/f1e03fef-cccf-43de-9d35-56d11d636765 --monitor_interface=ha-857640ad-a6 --monitor_cidr=169.254.0.1/24 --pid_file=/var/lib/neutron/external/pids/f1e03fef-cccf-43de-9d35-56d11d636765.monitor.pid --state_path=/var/lib/neutron --user=119 --group=125
root 2276896 0.0 0.0 6696 756 ? S Jul22 0:00 ip -o monitor address
root 2277216 0.0 0.0 44752 856 ? Ss Jul22 0:13 keepalived -P -f /var/lib/neutron/ha_confs/f1e03fef-cccf-43de-9d35-56d11d636765/keepalived.conf -p /var/lib/neutron/ha_confs/f1e03fef-cccf-43de-9d35-56d11d636765.pid -r /var/lib/neutron/ha_confs/f1e03fef-cccf-43de-9d35-56d11d636765.pid-vrrp
root 2277217 0.0 0.0 51148 1712 ? S Jul22 0:24 keepalived -P -f /var/lib/neutron/ha_confs/f1e03fef-cccf-43de-9d35-56d11d636765/keepalived.conf -p /var/lib/neutron/ha_confs/f1e03fef-cccf-43de-9d35-56d11d636765.pid -r /var/lib/neutron/ha_confs/f1e03fef-cccf-43de-9d35-56d11d636765.pid-vrrp
neutron 3284547 0.0 0.0 172176 36032 ? S Jul22 0:00 /usr/bin/python2.7 /usr/bin/neutron-ns-metadata-proxy --pid_file=/var/lib/neutron/external/pids/f1e03fef-cccf-43de-9d35-56d11d636765.pid --metadata_proxy_socket=/var/lib/neutron/metadata_proxy --router_id=f1e03fef-cccf-43de-9d35-56d11d636765 --state_path=/var/lib/neutron --metadata_port=8775 --metadata_proxy_user=119 --metadata_proxy_group=125 --verbose --log-file=neutron-ns-metadata-proxy-f1e03fef-cccf-43de-9d35-56d11d636765.log --log-dir=/var/log/neutron
# neutron l3-agent-list-hosting-router f1e03fef-cccf-43de-9d35-56d11d636765

Then, we learn that the master vrouter is in node-8.
There are other ways to know which node is master:
1. use the command to see if the interface qr-xxxxx and qg-xxxxx have ip address or not. If yes, this node is master.
- ip netns exec qrouter-f1e03fef-cccf-43de-9d35-56d11d636765 ip a
2. Check the following file that contains "master" or not.
- vim /var/lib/neutron/ha_confs/<< qrouter uuid >>/state
For more details:
http://www.slideshare.net/orimanabu/l3-ha-vrrp20141201

Friday, June 24, 2016
[Ceilometer] To survey how to improve the performance of OpenStack Ceilometer
Frankly speaking, OpenStack Ceilometer will suffer some kind of performance issues sooner or later if you don't modify or tune the configuration. The issues has two parts that need you to consider. One is the message bus and API loading, and the other is database. However, I find some best practices which are easy and quick for us to adopt. Here you go:
1. Telemetry(Ceilometer) best practices
a. Data collection
- Based on your needs, you can edit the pipeline.yaml configuration file to include a selected number of meters while disregarding the rest.
- By default, Telemetry service polls the service APIs every 10 minutes. You can change the polling interval on a per meter basis by editing the pipeline.yaml configuration file.
for example:
vim /etc/ceilometer/ceilometer.conf=> evaluation_interval=120vim /etc/ceilometer/pipeline.yaml=> interval: 120 - you can delay or adjust polling requests by enabling the jitter support. This adds a random delay on how the polling agents send requests to the service APIs. To enable jitter, set shuffle_time_before_polling_task in the ceilometer.conf configuration file to an integer greater than 0.
b. Data storage
- We recommend that you avoid open-ended queries.
- You can install the API behind mod_wsgi, as it provides more settings to tweak, likethreads and processes in case of WSGIDaemon. a. For more information on how to configure mod_wsgi, see the Telemetry Install Documentation.
- The collection service provided by the Telemetry project is not intended to be an archival service. Set a Time to Live (TTL) value to expire data and minimize the database size.
for example:
vi /etc/ceilometer/ceilometer.conf=> time_to_live=302400 - Use replica sets in MongoDB. Replica sets provide high availability through automatic failover. If your primary node fails, MongoDB will elect a secondary node to replace the primary node, and your cluster will remain functional.
- For more information on replica sets, see the MongoDB replica sets docs.
- Use sharding in MongoDB. Sharding helps in storing data records across multiple machines and is the MongoDB’s approach to meet the demands of data growth.
2. Metering Service (Ceilometer): Best Practices and Optimization
a. Modifying the List of Meters
sources:
    - name: meter_source
      interval: 604800
      meters:
          - "instance"
          - "image"
          - "image.size"
          - "image.upload"
          - "image.delete"
          - "volume"
          - "volume.size"
          - "snapshot"
          - "snapshot.size"
          - "ip.floating"
          - "network.*"
          - "compute.instance.create.end"
          - "compute.instance.delete.end"
          - "compute.instance.update"
          - "compute.instance.exists"
      sinks:
          - meter_sink
sinks:
    - name: meter_sink
      transformers:
      publishers:
          - notifier://
b. Modifying the Polling Intervals
The interval attribute is the time between polls. Meters that are available as both notification and polling are going to be polled at the specified interval. To rely on notifications rather than polling, set the interval attribute to 604800 seconds, or once a week.
Reference


One of the main issues operators relayed was the polling that Ceilometer was running on Nova to gather instance information. It had a highly negative impact on the Nova API CPU usage, as it retrieves all the information about instances on regular intervals.
[Linux] Why does Linux require moving IP from eth interface to bridge interface?
This could be a common problem if you have KVM ( or other hypervisor in Linux ) on your physical server and want to use bridge mode with your VMs. At the same time, you also want to let your physical server has the network that can be accessed from other hosts at the same network subnet. At this moment, when a network interface (e.g., eth0) is added to a Linux bridge (e.g., br0), the IP address must be removed from eth0 and added to br0 for the networking to function properly.
I find some answers as follows:
http://unix.stackexchange.com/questions/86056/why-does-linux-require-moving-ip-from-eth-interface-to-bridge-interface
http://unix.stackexchange.com/questions/52674/why-doesnt-eth0-get-an-ip-address-when-set-up-in-a-bridge
==>
The NIC represents the uplink cable. A cable is layer 1, not layer 3. Now the Bridge works as the device that is being addressed for network traffic (incoming) on the server - either on layer 2 (Ethernet/MAC) and/or layer 3 (IP). So the device that responds to ARP-requests is the bridge - which is good, since it needs to distribute the traffic to the other interfaces on that bridge. If the responding device were the NIC, traffic would not be passed further on to the bridge.
==>
Normally it does not make sense to put any L3 protocol address on port interfaces - because incoming packets are diverted to the bridge interface before the L3 protocol is examined. This means the L3 protocol running on the port interface will never see any incoming packets.
Wednesday, June 15, 2016
[Neutron] Neutron Cheat Cheat Sheet
In recent days, the hand drawing style is becoming more and more pervasive in Taiwan. I don't know how it happens, but at least I can draw the Neutron cheat cheat sheet to echo this kind of style for fun.
P.S: This picture is originally for my colleagues to trouble shooting the Neutron networking problems.

P.S: This picture is originally for my colleagues to trouble shooting the Neutron networking problems.

Thursday, June 2, 2016
[Neutron and SDN] Warm-up for understaning the integration of Neutron and SDN
I just spend some time to study the integration of Neutron and SDN. Furthermore, I also take a look at how ODL and ONOS are integrated with OpenStack Neutron. The following content and picture ( with URL link) are excerpted from the variety of resource in the internet. Some of sections has my comment with P.S. I think it can give you a clear concept of Neutron and SDN controller.
Neutron and SDN


Reference:
Here is an article to talk about writing a dummy mechanism driver to record variables and data in logs
http://blog.csdn.net/yanheven1/article/details/47357537
Neutron and SDN
P.S: This picture gives an overall architecture about Neutron and SDN controller that are integrated together.
When an OpenStack user performs any networking related operation (create/update/delete/read on network, subnet and port resources) the typical flow would be as follows:
- The user operation on the OpenStack dashboard (Horizon) will be translated into a corresponding networking API and sent to the Neutron server.
- The Neutron server receives the request and passes the same to the configured plugin (assume ML2 is configured with an ODL mechanism driver and a VXLAN type driver).
- The Neutron server/plugin will make the appropriate change to the DB.
- The plugin will invoke the corresponding REST API to the SDN controller (assume an ODL).
- ODL, upon receiving this request, may perform necessary changes to the network elements using any of the southbound plugins/protocols, such as OpenFlow, OVSDB or OF-Config.
We should note there exists different integration options with the SDN controller and OpenStack; for example:
- one can completely eliminate RPC communications between the Neutron server and agents on the compute node, with the SDN controller being the sole entity managing the network
- or the SDN controller manages only the physical switches, and the virtual switches can be managed from the Neutron server directly.
Neutron底層網絡的兩種模型示意如下。
第一種模型a) Neutron相當於SDN控制器,plugin與agent間的通信機制(如rpc)就相當於簡單的南向協議。第二種模型中Neutron作為SDN應用,將業務需求告知SDN控制器,SDN控制器再通過五花八門的南向協議遠程控製網絡設備。
第二種模型b) 也可以把Neutron看做超級控制器或者網絡編排器,去完成OpenStack中網絡業務的集中分發。
Plugin Agent
P.S: This picture shows the process flow between agents, api server and ovs when creating a VM.
http://www.innervoice.in/blogs/wp-content/uploads/2015/03/Plugin-Agents.jpg
http://www.innervoice.in/blogs/wp-content/uploads/2015/03/Plugin-Agents.jpg
About ML2
Neutron plugin体系
How OpenDaylight to integrate with Neutron
How is ONOS to integrate with Neutron
SONA Architecture
onos-networking plugin just forwards (or calls) REST calls from nova to ONOS, and OpenstackSwitching app receives the API calls and returns OK. Main functions to implement the virtual networks are handled in OpenstackSwitching application.
OpenstackSwitching (App on ONOS)
Neutron + SDN Controller (ONOS)
P.S: ONOS provides its ONOSMechanismDriver instead of OpenvswitchMechanismDriver
Reference:
Here is an article to talk about writing a dummy mechanism driver to record variables and data in logs
http://blog.csdn.net/yanheven1/article/details/47357537
Thursday, May 26, 2016
[Proxy ARP] What is Proxy ARP?
Why I mention Proxy ARP is because in OpenStack environment, this function exists in FIP namespace with DVR enabled. The way to check whether the FIP namespace's Proxy ARP enabled is here:
# ip netns exec fip-545b57e2-0fa5-46da-89a2-591f7a5474ce cat /proc/sys/net/ipv4/conf/fg-2f3f4992-23/proxy_arp
1
We also can see the arp and ip mapping:
# ip netns exec fip-545b57e2-0fa5-46da-89a2-591f7a5474ce ip neighbor
10.12.20.32 dev fpr-6ddabb95-1 lladdr 42:72:88:ca:07:72 STALE
The following is the explaination about Proxy ARP
http://linux-ip.net/html/ether-arp-proxy.html
Occasionally, an IP network must be split into separate segments. Proxy ARP can be used for increased control over packets exchanged between two hosts or to limit exposure between two hosts in a single IP network. The technique of proxy ARP is commonly used to interpose a device with higher layer functionality between two other hosts. From a practical standpoint, there is little difference between the functions of a packet-filtering bridge and a firewall performing proxy ARP. The manner by which the interposed device receives the packets, however, is tremendously different.
Example 2.10. Proxy ARP Network Diagram

The device performing proxy ARP (masq-gw) responds for all ARP queries on behalf of IPs reachable on interfaces other than the interface on which the query arrives.
FIXME; manual proxy ARP (see also Section 9.3, “Breaking a network in two with proxy ARP”), kernel proxy ARP, and the newly supported sysctl net/ipv4/conf/$DEV/medium_id.
For a brief description of the use of medium_id, see Julian's remarks.
FIXME; Kernel proxy ARP with the sysctl net/ipv4/conf/$DEV/proxy_arp.
Wednesday, May 11, 2016
[Docker] the first experience with building docker image
It is essential to look for the docker image first if you need some services or functions running on docker container. But, once you want to customize it, you probably need to build your own docker image. The official document gives you a very complete description for you to do so. Please refer to this https://docs.docker.com/engine/userguide/containers/dockerimages/
The following command list are my steps to build a customized Drupal docker image.
The are two ways to build your own image:

Second, to create a repository for your docker image.

If it's done, you can see this:

So, we can continue to the next step.
# Download the offical Drupal docker image
$ docker search drupal
$ docker pull drupal
$ docker images
# Create a container and update it ( be aware of the follwing parameters )
$ docker run -i -t --name danny_drupal -p 8000:80 drupal /bin/bash
-i, --interactive Keep STDIN open even if not attached
-t, --tty Allocate a pseudo-TTY
-p, --publish=[] Publish a container's port(s) to the host
# From now on, you can go anything for your container
root@2a0849519c71:/var/www/html# apt-get update
root@2a0849519c71:/var/www/html# apt-get install openssh-server cloud-init -y
root@2a0849519c71:/var/www/html# exit
# To commit my changes
$ docker commit -m "Added my services" -a "teyenliu" \
danny_drupal teyenliu/drupal:v1
# Have to login docker before you push your change
$ docker login --username=teyenliu
$ docker push teyenliu/drupal
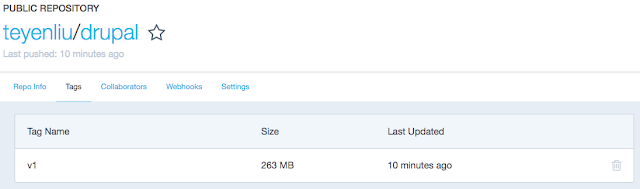
# Now it is successful to push your own drupal image and you also can see it on docker hub:
# To test your own drupal image:
$ docker run --name danny_drupal -p 8000:80 -d teyenliu/drupal:v1
# To check if the container is running
$ docker ps
# Open your browser with http://127.0.0.1:8000

$ docker build -t teyenliu/drupal:v2 .
$ docker push teyenliu/drupal:v2
# The drupal repository will append the image of tag:v2

P.S: If you want to put the docker image to OpenStack Glance for further using, here is an example command:
$ docker save teyenliu/drupal | glance image-create --container-format docker --disk-format raw --name teyenliu/druapl
The following command list are my steps to build a customized Drupal docker image.
The are two ways to build your own image:
1. Updating and committing an image
First, it would be better to have a Docker Hub account like this:
Second, to create a repository for your docker image.

If it's done, you can see this:

So, we can continue to the next step.
# Download the offical Drupal docker image
$ docker search drupal
$ docker pull drupal
$ docker images
# Create a container and update it ( be aware of the follwing parameters )
$ docker run -i -t --name danny_drupal -p 8000:80 drupal /bin/bash
-i, --interactive Keep STDIN open even if not attached
-t, --tty Allocate a pseudo-TTY
-p, --publish=[] Publish a container's port(s) to the host
# From now on, you can go anything for your container
root@2a0849519c71:/var/www/html# apt-get update
root@2a0849519c71:/var/www/html# apt-get install openssh-server cloud-init -y
root@2a0849519c71:/var/www/html# exit
# To commit my changes
$ docker commit -m "Added my services" -a "teyenliu" \
danny_drupal teyenliu/drupal:v1
# Have to login docker before you push your change
$ docker login --username=teyenliu
$ docker push teyenliu/drupal
# Now it is successful to push your own drupal image and you also can see it on docker hub:

# To test your own drupal image:
$ docker run --name danny_drupal -p 8000:80 -d teyenliu/drupal:v1
# To check if the container is running
$ docker ps
# Open your browser with http://127.0.0.1:8000

2. Buidling an image from Dockerfile
$ vim Dockerfile# This is a commentFROM drupal:latestMAINTAINER TeYen Liu <teyen.liu@gmail.com>RUN apt-get update && apt-get install -y gitRUN apt-get install -y openssh-serverRUN apt-get install -y cloud-init
$ docker push teyenliu/drupal:v2
# The drupal repository will append the image of tag:v2

P.S: If you want to put the docker image to OpenStack Glance for further using, here is an example command:
$ docker save teyenliu/drupal | glance image-create --container-format docker --disk-format raw --name teyenliu/druapl
Tuesday, May 3, 2016
[Python] Problem with Python logging RotatingFileHandler in Django website
If seeing the log files are not rotated properly or correctly in Django web site, you most likely encounter the problem as the following article described:
Problem with Python logging RotatingFileHandler in Django website
I did some survey and found the root cause is in here:
RotatingFileHandler bugs/errors and a general logging question
"The logging system is thread-safe but not safe
against multiple processes (separate Python instances) writing to the
same file. It certainly sounds like you need a scalable solution - and
having each script send the events to a network logging server seems a
good way of handling the scalability requirement. "
These words above remind me a lot about the importance of synchronization when using multi-threading and multi-process. Also, scaling is another important item that a lot of people don't care. I want to highlight that we should be vigilant about these.
So, it is not your fault. Don't blame yourself. ( Sorry, I am kidding you ... )
Here is one solution for this issue. Please check out the following link ( it's written in Chinese ):
http://www.djangochina.cn/forum.php?mod=viewthread&tid=118752
Problem with Python logging RotatingFileHandler in Django website
"The log is done via RotatingFileHandler which is configured with 10 log files, 1000000 byte each. The log system works, but this are the log files I get:
-rw-r--r-- 1 apache      apache          83 Jul 23 13:30 hr.log
-rw-r--r-- 1 apache      apache      446276 Jul 23 13:03 hr.log.1
-rw-r--r-- 1 apache      apache      999910 Jul 23 06:00 hr.log.10
-rw-r--r-- 1 apache      apache         415 Jul 23 16:24 hr.log.2
-rw-r--r-- 1 apache      apache      479636 Jul 23 16:03 hr.log.3
-rw-r--r-- 1 apache      apache         710 Jul 23 15:30 hr.log.4
-rw-r--r-- 1 apache      apache      892179 Jul 23 15:03 hr.log.5
-rw-r--r-- 1 apache      apache         166 Jul 23 14:30 hr.log.6
-rw-r--r-- 1 apache      apache      890769 Jul 23 14:03 hr.log.7
-rw-r--r-- 1 apache      apache      999977 Jul 23 12:30 hr.log.8
-rw-r--r-- 1 apache      apache      999961 Jul 23 08:01 hr.log.9
As you can see it is a mess. Last log has been written to file hr.log.2 (Jul 23 16:24) instead of hr.log"
I did some survey and found the root cause is in here:
RotatingFileHandler bugs/errors and a general logging question
"The logging system is thread-safe but not safe
against multiple processes (separate Python instances) writing to the
same file. It certainly sounds like you need a scalable solution - and
having each script send the events to a network logging server seems a
good way of handling the scalability requirement. "
These words above remind me a lot about the importance of synchronization when using multi-threading and multi-process. Also, scaling is another important item that a lot of people don't care. I want to highlight that we should be vigilant about these.
So, it is not your fault. Don't blame yourself. ( Sorry, I am kidding you ... )
Here is one solution for this issue. Please check out the following link ( it's written in Chinese ):
http://www.djangochina.cn/forum.php?mod=viewthread&tid=118752
Subscribe to:
Posts (Atom)