I just keep a record for myself because there are a lot of documents teaching how to train your haar classifier and almost of them seem to don't work well. The following 2 items are clear and easy to understand.
The Data Image Source (cars) I use.
http://cogcomp.cs.illinois.edu/Data/Car/
1. Train your own OpenCV Haar classifier
https://github.com/mrnugget/opencv-haar-classifier-training
find ./positive_images -iname "*.pgm" > positives.txt
find ./negative_images -iname "*.pgm" > negatives.txt
perl bin/createsamples.pl positives.txt negatives.txt samples 550\
"opencv_createsamples -bgcolor 0 -bgthresh 0 -maxxangle 1.1\
-maxyangle 1.1 maxzangle 0.5 -maxidev 40 -w 48 -h 24"
python ./tools/mergevec.py -v samples/ -o samples.vec
opencv_traincascade -data classifier -vec samples.vec -bg negatives.txt\
-numStages 10 -minHitRate 0.999 -maxFalseAlarmRate 0.5 -numPos 1000\
-numNeg 600 -w 48 -h 24 -mode ALL -precalcValBufSize 1024\
-precalcIdxBufSize 1024
2. OpenCV Tutorial: Training your own detector | packtpub.com
https://www.youtube.com/watch?v=WEzm7L5zoZE
find pos/ -name '*.pgm' -exec echo \{\} 1 0 0 100 40 \; > cars.info
find neg/ -name '*.pgm' > bg.txt
opencv_createsamples -info cars.info -num 550 -w 48 -h 24 -vec cars.vec
opencv_createsamples -w 48 -h 24 -vec cars.vec
opencv_traincascade -data data -vec cars.vec -bg bg.txt \
-numPos 500 -numNeg 500 -numStages 10 -w 48 -h 24 -featureType LBP
P.S: Which one is best? I don't know...
Tuesday, September 13, 2016
[Image] How to resize, convert & modify images from the Linux
Installation
$ sudo apt-get install imagemagick
Converting Between Formats
$ convert howtogeek.png howtogeek.jpg
You can also specify a compression level for JPEG images:
$ convert howtogeek.png -quality 95 howtogeek.jpg
Resizing Images
$ convert example.png -resize 200×100 example.png
- to force the image to become a specific size – even if it messes up the aspect ratio
$ convert example.png -resize 200×100! example.png
$ convert example.png -resize 200 example.png
$ convert example.png -resize x100 example.png
Rotating an Image
convert howtogeek.jpg -rotate 90 howtogeek-rotated.jpg
Applying Effects
ImageMagick can apply a variety of effects to an image.
- For example, the following command applies the “charcoal” effect to an image:
$ convert howtogeek.jpg -charcoal 2 howtogeek-charcoal.jpg
- the “Implode” effect with a strength of 1:
# convert howtogeek.jpg -implode 1 howtogeek-imploded.jpg
Batch Processing
for file in *.png; do convert $file -rotate 90 rotated-$file; done
Reference:
http://www.howtogeek.com/109369/how-to-quickly-resize-convert-modify-images-from-the-linux-terminal/
Thursday, September 8, 2016
[TensorFlow] My case to install TensorFlow with GPU enabled
My Operation System is Ubuntu 14.04 LTS 5 and GPU card is GeForce GTX 750Ti
1. Go to nvidia.com and download the driver (NVIDIA-Linux-x86_64-367.44.sh)
1. Go to nvidia.com and download the driver (NVIDIA-Linux-x86_64-367.44.sh)
2. For Nvidia to find linux header files (*):
$ sudo apt-get install build-essential linux-headers-$(uname -r)
3. To enable full screen text mode (nomodeset):
$ sudo gedit /etc/default/grub
>> Edit GRUB_CMDLINE_LINUX_DEFAULT="quiet splash nomodeset"
Save it and reboot
$ sudo update-grub
$ sudo reboot
4. Log into with Ctl +Alt + F1
5. Stop the X Server service
$ sudo service lightdm stop
6. Install nVidia driver
$ sudo ./NVIDIA-Linux-x86_64-367.44.sh
7. Install CUDA (GPUs on Linux)
Download and install Cuda Toolkit
sudo dpkg -i cuda-repo-ubuntu1404-8-0-local_8.0.44-1_amd64.deb
sudo apt-get update
sudo apt-get install cuda
8. Download and install cuDNN
tar xvzf cudnn-8.0-linux-x64-v5.1.tgz
cd cudasudo cp include/cudnn.h /usr/local/cuda-8.0/include
sudo cp lib64/* /usr/local/cuda-8.0/lib64
sudo chmod a+r /usr/local/cuda-8.0/lib64/libcudnn*
9. You also need to set the LD_LIBRARY_PATH and CUDA_HOME environment variables. Consider adding the commands below to your ~/.bash_profile. These assume your CUDA installation is in /usr/local/cuda:
$ vim ~/.bashrc
export LD_LIBRARY_PATH="$LD_LIBRARY_PATH:/usr/local/cuda-8.0/lib64"export CUDA_HOME=/usr/local/cuda-8.0
export PATH="$CUDA_HOME/bin:$PATH"
export PATH="$PATH:$HOME/bin"
10. To install TensorFlow for Ubuntu/Linux 64-bit, GPU enabled:
$ sudo pip install --upgrade https://storage.googleapis.com/tensorflow/linux/gpu/tensorflow-0.10.1-cp27-none-linux_x86_64.whl
$ sudo pip install --upgrade https://storage.googleapis.com/tensorflow/linux/gpu/tensorflow-0.10.1-cp27-none-linux_x86_64.whl
To find out which device is used, you can enable log device placement like this:
$ python
>>>> import tensorflow as tf
>>>> sess = tf.Session(config=tf.ConfigProto(log_device_placement=True))
$ python
>>>> import tensorflow as tf
>>>> sess = tf.Session(config=tf.ConfigProto(log_device_placement=True))
Tuesday, August 16, 2016
[OpenCV] To install OpenCV on Debian and create a test project using Netbeans
This document is the steps to install OpenCV on Debian and create a test project using Netbeans for my reference in case.
#Prepare the build environment GCC、Cmake、pkgconfig
#Install ImageI/O libraries
#Install Viode I/O libraries
#Install GTK+2.x and QT libraries
#Prepare the build environment GCC、Cmake、pkgconfig
$sudo apt-get -y install build-essential cmake pkg-config
#Install ImageI/O libraries
$sudo apt-get -y install libjpeg62-dev libtiff4-dev libjasper-dev
#Install Viode I/O libraries
$sudo apt-get -y install libavcodec-dev libavformat-dev libswscale-dev libv4l-dev
$sudo apt-get -y install libdc1394-22-dev libxine2-dev libgstreamer0.10-dev libgstreamer-plugins-base0.10-dev
#Install GTK+2.x and QT libraries
$sudo apt-get -y install libgtk2.0-dev libqt4-dev
Thursday, August 11, 2016
[Hadoop] Setting up a Single Node Cluster
Basically these resource links are good enough to do a single node cluster of Hadoop MapReduce. But I still want to add some comments for my reference.
http://www.thebigdata.cn/Hadoop/15184.html
http://www.powerxing.com/install-hadoop/
Login the user "hadoop"
Go to the location of Hadoop
Add the variables in ~/.bashrc
Modify $JAVA_HOME in etc/hadoop/hadoop-env.sh
Start dfs and yarn
Finally, we can try the Hadoop MapReduce example as follows:
P.S:
In order to forcefully let the namenode leave safemode, following command should be executed:
http://www.thebigdata.cn/Hadoop/15184.html
http://www.powerxing.com/install-hadoop/
Login the user "hadoop"
# sudo su - hadoop
Go to the location of Hadoop
# /usr/local/hadoop
Add the variables in ~/.bashrc
export JAVA_HOME=/usr/lib/jvm/java-7-openjdk-amd64
export HADOOP_HOME=/usr/local/hadoop
export HADOOP_CONF_DIR=$HADOOP_HOME/etc/hadoop
export HADOOP_INSTALL=/usr/local/hadoop
export PATH=$PATH:$HADOOP_INSTALL/bin
export PATH=$PATH:$HADOOP_INSTALL/sbin
export HADOOP_MAPRED_HOME=$HADOOP_INSTALL
export HADOOP_COMMON_HOME=$HADOOP_INSTALL
export HADOOP_HDFS_HOME=$HADOOP_INSTALL
export YARN_HOME=$HADOOP_INSTALL
Modify $JAVA_HOME in etc/hadoop/hadoop-env.sh
export JAVA_HOME=/usr/lib/jvm/java-7-openjdk-amd64
Start dfs and yarn
# sbin/start-dfs.sh
# sbin/start-yarn.sh
Finally, we can try the Hadoop MapReduce example as follows:
# bin/hadoop jar share/hadoop/mapreduce/hadoop-mapreduce-examples-2.7.0.jar grep input output 'dfs[a-z.]+'
P.S:
In order to forcefully let the namenode leave safemode, following command should be executed:
# hdfs dfsadmin -safemode leave
Tuesday, August 2, 2016
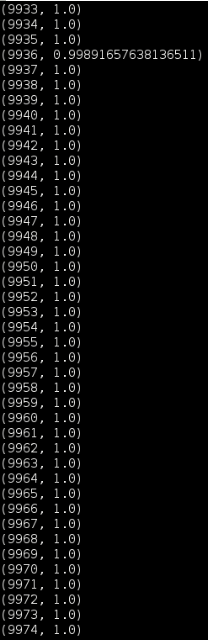
[Tensorflow] Fizz-Buzz example enhancement
I am just based on this Fizz-Buzz example as below to add 2nd convolution layer and guess what? The result is quicker to be learn. But, this is just the first step to learn "Deep Learning"...
There is still a lot of things and knowledge that need to learn more.
http://joelgrus.com/2016/05/23/fizz-buzz-in-tensorflow/
Before
After

Reference
http://www.slideshare.net/WrangleConf/wrangle-2016-lightning-talk-fizzbuzz-in-tensorflow
There is still a lot of things and knowledge that need to learn more.
http://joelgrus.com/2016/05/23/fizz-buzz-in-tensorflow/
Before

After

Reference
http://www.slideshare.net/WrangleConf/wrangle-2016-lightning-talk-fizzbuzz-in-tensorflow
Monday, July 25, 2016
[Neutron] The first glance of L3HA mode in OpenStack Neutron ( Liberty version )
I just quickly take the first glance of L3HA mode in OpenStack Neutron ( Liberty version ) and is based on my tenant environment as follows:

# neutron net-list


Here I have 2 instances in my tenant:

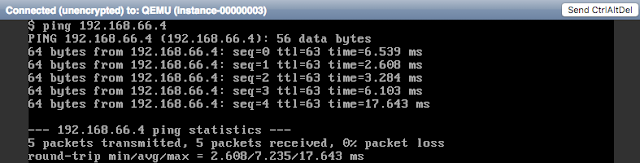
So, if I use the instance: daanny_vm1 to ping danny_vm2, due to the different subnets, this action will trigger L3 vrouter function.
# ping 192.168.66.4 ( danny_vm2 )
# ip netns exec qrouter-f1e03fef-cccf-43de-9d35-56d11d636765 tcpdump -eln -i qr-4433f31f-5d icmp

The interface qr-4433f31f-5d is my subnet 192.168.44.0/24's gateway port as follows:


My tenant environment
# neutron router-list# neutron net-list

# neutron subnet-list

The Topology view looks like this:

Here I have 2 instances in my tenant:

So, if I use the instance: daanny_vm1 to ping danny_vm2, due to the different subnets, this action will trigger L3 vrouter function.
# ping 192.168.66.4 ( danny_vm2 )

# ip netns exec qrouter-f1e03fef-cccf-43de-9d35-56d11d636765 tcpdump -eln -i qr-4433f31f-5d icmp

The interface qr-4433f31f-5d is my subnet 192.168.44.0/24's gateway port as follows:
# neutron --os-tenant-name danny port-list | grep 4433f31f-5d
| 4433f31f-5d93-4fe4-868a-04ddcc38be20 |                                                 | fa:16:3e:25:22:b3 | {"subnet_id": "d169f180-4304-42f0-b11f-e094287bcd00", "ip_address": "192.168.44.1"}  |
Keepalived related
L3HA mode is havily relied on the daemon: Keepalived and this daemon is existed in qrouter namespace.
# vi /var/lib/neutron/ha_confs/f1e03fef-cccf-43de-9d35-56d11d636765/keepalived.conf
vrrp_instance VR_1 {
    state BACKUP
    interface ha-857640ad-a6
    virtual_router_id 1
    priority 50
    garp_master_delay 60
    nopreempt
    advert_int 2
    track_interface {
        ha-857640ad-a6
    }
    virtual_ipaddress {
        169.254.0.1/24 dev ha-857640ad-a6
    }
    virtual_ipaddress_excluded {
        10.12.20.32/16 dev qg-f02984c6-dc
        10.12.20.33/32 dev qg-f02984c6-dc
        192.168.44.1/24 dev qr-4433f31f-5d
        192.168.55.1/24 dev qr-16e20a36-fc
        192.168.66.1/24 dev qr-35235c4f-64
        fe80::f816:3eff:fe0d:2702/64 dev qr-16e20a36-fc scope link
        fe80::f816:3eff:fe25:22b3/64 dev qr-4433f31f-5d scope link
        fe80::f816:3eff:fe51:30a1/64 dev qg-f02984c6-dc scope link
        fe80::f816:3eff:fe8f:a85b/64 dev qr-35235c4f-64 scope link
    }
    virtual_routes {
        0.0.0.0/0 via 10.12.0.254 dev qg-f02984c6-dc
    }
}
There are other two files under /var/lib/neutron/ha_confs/<< qrouter uuid >>/
neutron-keepalived-state-change.log ==> log file
state ==> HA status
# find -L /proc/[1-9]*/task/*/ns/net -samefile /run/netns/qrouter-f1e03fef-cccf-43de-9d35-56d11d636765 | cut -d/ -f5
2276895
2276896
2277216
2277217
3284547
# ps aux | grep -e "2276895|2276896|2277216|2277217|3284547"
neutron 2276895 0.0 0.0 126160 41364 ? S Jul22 0:00 /usr/bin/python2.7 /usr/bin/neutron-keepalived-state-change --router_id=f1e03fef-cccf-43de-9d35-56d11d636765 --namespace=qrouter-f1e03fef-cccf-43de-9d35-56d11d636765 --conf_dir=/var/lib/neutron/ha_confs/f1e03fef-cccf-43de-9d35-56d11d636765 --monitor_interface=ha-857640ad-a6 --monitor_cidr=169.254.0.1/24 --pid_file=/var/lib/neutron/external/pids/f1e03fef-cccf-43de-9d35-56d11d636765.monitor.pid --state_path=/var/lib/neutron --user=119 --group=125
root 2276896 0.0 0.0 6696 756 ? S Jul22 0:00 ip -o monitor address
root 2277216 0.0 0.0 44752 856 ? Ss Jul22 0:13 keepalived -P -f /var/lib/neutron/ha_confs/f1e03fef-cccf-43de-9d35-56d11d636765/keepalived.conf -p /var/lib/neutron/ha_confs/f1e03fef-cccf-43de-9d35-56d11d636765.pid -r /var/lib/neutron/ha_confs/f1e03fef-cccf-43de-9d35-56d11d636765.pid-vrrp
root 2277217 0.0 0.0 51148 1712 ? S Jul22 0:24 keepalived -P -f /var/lib/neutron/ha_confs/f1e03fef-cccf-43de-9d35-56d11d636765/keepalived.conf -p /var/lib/neutron/ha_confs/f1e03fef-cccf-43de-9d35-56d11d636765.pid -r /var/lib/neutron/ha_confs/f1e03fef-cccf-43de-9d35-56d11d636765.pid-vrrp
neutron 3284547 0.0 0.0 172176 36032 ? S Jul22 0:00 /usr/bin/python2.7 /usr/bin/neutron-ns-metadata-proxy --pid_file=/var/lib/neutron/external/pids/f1e03fef-cccf-43de-9d35-56d11d636765.pid --metadata_proxy_socket=/var/lib/neutron/metadata_proxy --router_id=f1e03fef-cccf-43de-9d35-56d11d636765 --state_path=/var/lib/neutron --metadata_port=8775 --metadata_proxy_user=119 --metadata_proxy_group=125 --verbose --log-file=neutron-ns-metadata-proxy-f1e03fef-cccf-43de-9d35-56d11d636765.log --log-dir=/var/log/neutron
# neutron l3-agent-list-hosting-router f1e03fef-cccf-43de-9d35-56d11d636765

Then, we learn that the master vrouter is in node-8.
There are other ways to know which node is master:
1. use the command to see if the interface qr-xxxxx and qg-xxxxx have ip address or not. If yes, this node is master.
- ip netns exec qrouter-f1e03fef-cccf-43de-9d35-56d11d636765 ip a
2. Check the following file that contains "master" or not.
- vim /var/lib/neutron/ha_confs/<< qrouter uuid >>/state
For more details:
http://www.slideshare.net/orimanabu/l3-ha-vrrp20141201

Subscribe to:
Posts (Atom)